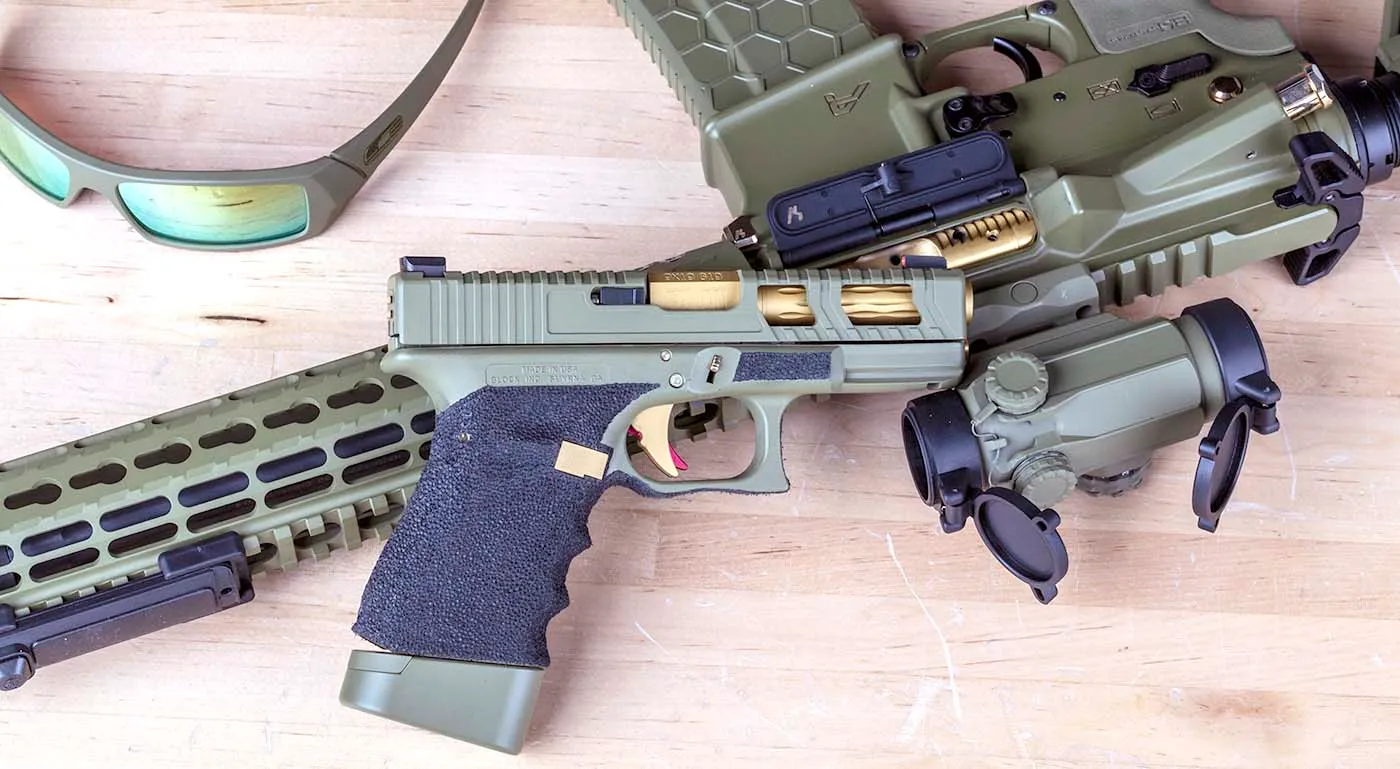
BUILDER: KEITH G., PRIMARY ARMS CUSTOMER SERVICE ASSISTANT MANAGER
It all started with a gold Sharpie and a conversation with a coworker who likes to enable me when I have ideas for new builds.
I had an Aero Precision receiver set and a handguard that was Cerakoted in a bazooka green color. Why that color? I cannot say specifically, other than the fact that it looked like the old plastic army men toys we all used to have growing up and I thought that would be cool. But also, really ugly and a good conversation rifle.
So, I set out to build an ugly AR-15, all bazooka green, just for the heck of it. Then I talked to Colin, who is never short on ideas – some of them are even good! My ugly build was about to reach truly epic levels of ugliness. Or so we thought.
We’ve got a lot of awesome people here at PA, and you may have gotten an idea of how Colin’s mind works if you read his Builder’s Corner article on his 6.5 Creedmoor build he calls Artemis. Suffice it to say, when I showed him my bazooka green lower, upper, and handguard, he just so happened to have a gold sharpie in arm’s reach. And he likes to enable my questionable ideas.
We did a quick, off-hand color fill job on the roll marks and safety selector indicators just to add to the ugly. Much to our surprise when it didn’t look half-bad!
My concept for the final form of this rifle was beginning to take shape. I decided to commit to the gold accents, add some parts whose performance I really love, and make a range-ready gun that can hold its own out on the range and turn some heads while doing it. This is no Safe Queen rifle. This is a beast that must be seen to be believed. Let’s take a look.
THE PARTS:
Our Primary Arms Builder’s Corner series gives you a look at some unique builds from PA employees to give you ideas, inspiration, and the details you need to tackle an awesome new build for yourself.
THE LOWER
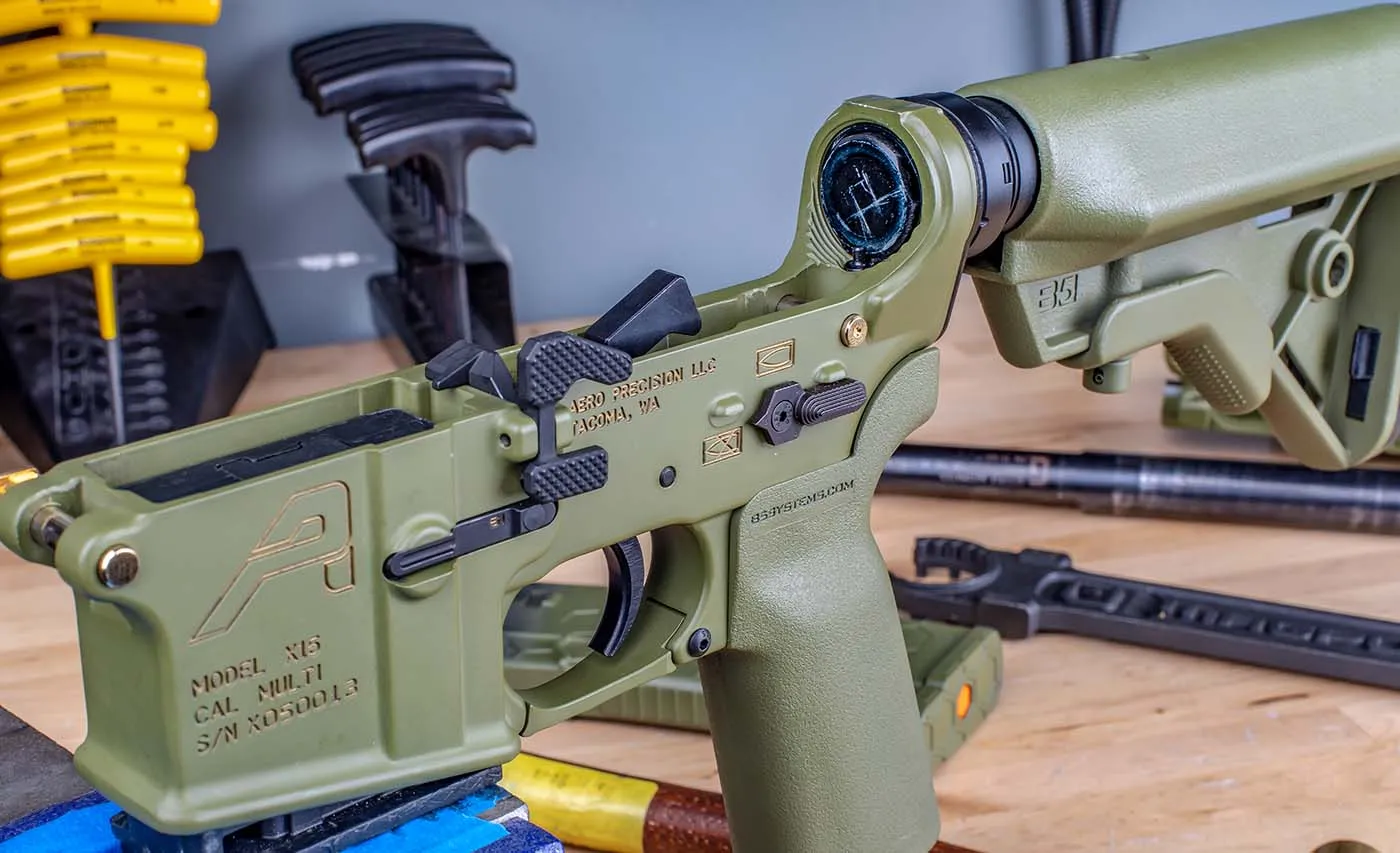
My lower is a basic Aero Precision stripped lower. The Gen 2 versions are pretty solid. They’re forged with an open-ear design. I put an Aero Precision trigger guard on mine. Of course, as is the case with the entire rifle, it was Cerakoted in Bazooka Green.
TRIGGER
This build was not ever meant to be a very expensive one. I build a lot of rifles and I like to try new parts and see what works for me. If something works, I like it, I keep it, and I’ll buy more of it in the future. That was the case with this trigger. I got the Rise Armament single-stage Black Fallout trigger. There are plenty of other drop-in triggers out there that are way more expensive, and generally, you get what you pay for. But at this price point, this trigger is very hard to beat. To me, it has a crisp break and a short reset, and it is very repeatable for me. I’d certainly buy it again and put it on another rifle.
LOWER PARTS
For my lower parts, I knew I wanted a mix of gold and black, but the parts had to perform first and foremost. I have the Strike Industries magazine catch as well as their HEX 60/90 safety selector. I also have an ODIN Works XMR2 extended magazine release and a Geissele Automatics Maritime extended bolt catch. All of these parts on the rifle strayed away from the Gold theme because I wanted a little bit of contrast on the lower to make the gold jump out as well as to look good with the barrel showing through the handguard. Anything else I didn’t mention is MIL-SPEC.
However, there is one set of lower parts I was able to get in gold and add to the overall theme of the rifle. The Strike Industries extended pivot and takedown pins come in a ton of sweet-looking colors, but the gold was perfect for this build. They add a little pop of color that looks good with the black parts on the rest of the lower. The best part about these pins is that they are not very expensive, only about $12, and they make a huge difference when trying to pop out your pins with gloves on or if you have cold hands.
THE UPPER
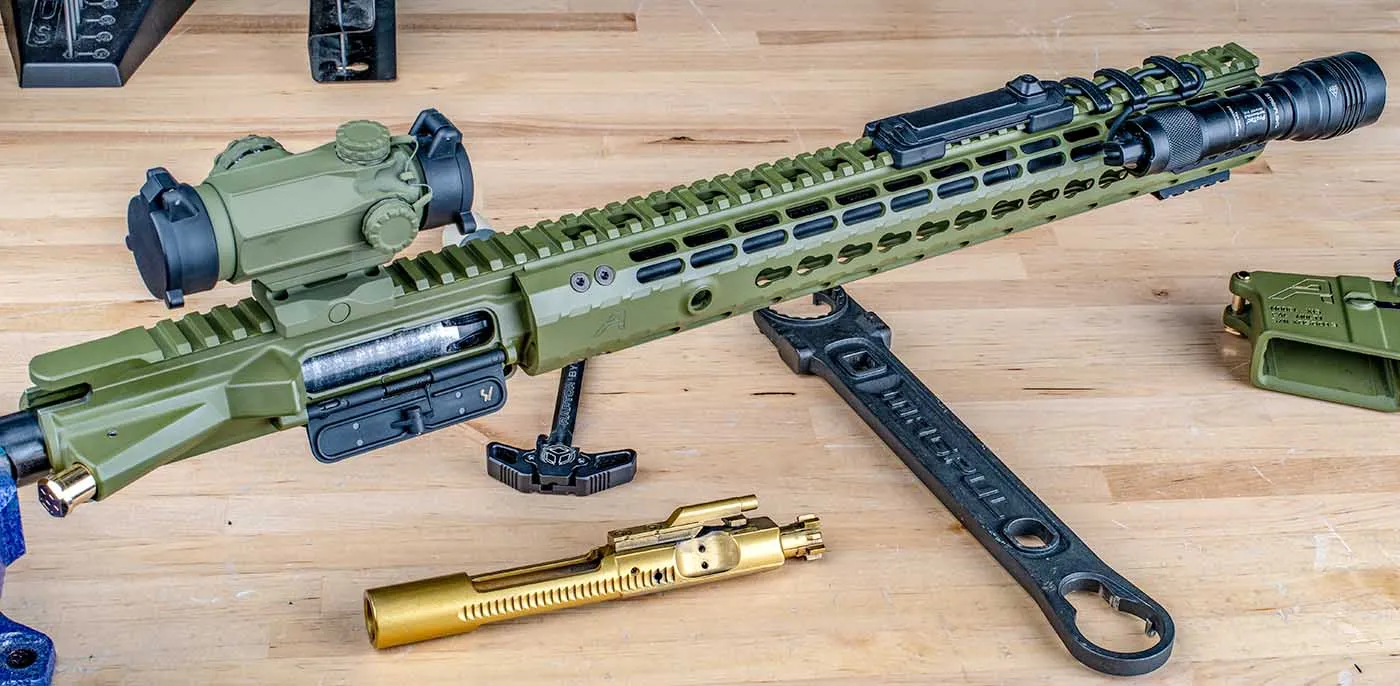
The upper receiver I chose for this build was something new for me. I’ve always thought Aero Precision made great products all around, and at the time they had introduced their Enhanced Upper Receiver and handguard combination. The M4E1 Enhanced Upper Receiver Assembly doesn’t require a barrel nut and is made to be used with the Aero Enhanced Handguard specifically. It makes for a really solid platform overall and only requires 8 Allen screws to secure the handguard to the receiver. The handguard isn’t the most low-profile offering from Aero in the handguard department, but it’s comfortable and has plenty of potential for attachments with the Keymod system.
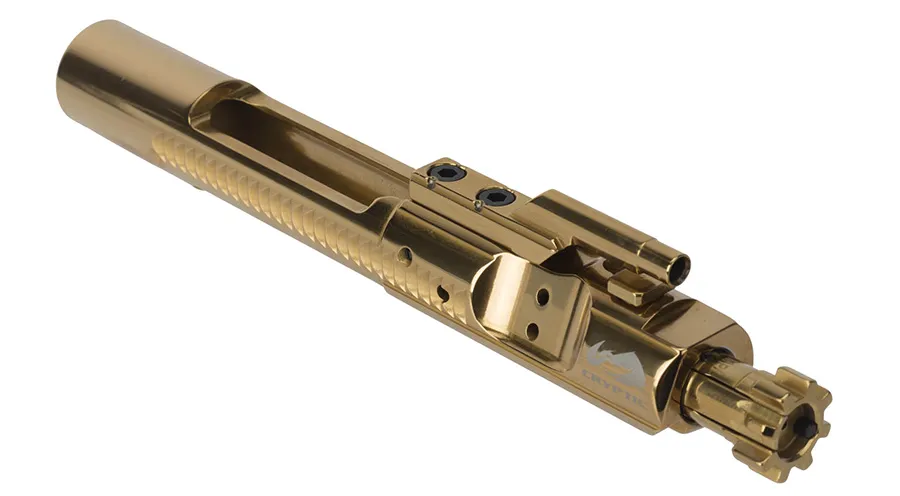
The gold theme continues with my bolt carrier group, which has a titanium nitride finish in gold that I think looks pretty awesome. Bolt carriers with coatings beyond just MIL SPEC Parkerizing really do make a difference in how easy it is to clean your rifle, keep it clean, and keep it reliable. I can’t recommend them enough. I’ll be honest, I don’t even recall what manufacturer made this BCG, but I will say that if I was to replace it today, it’d be an easy choice. I’d be grabbing a Cryptic Coatings PVD-coated BCG in Mystic Gold, without a doubt. Reading our BCG Buyer’s Guide sold me on getting one of these in the future.
Some other cool stuff I’ve got on my upper really helps bring the build together. My charging handle is a Radian Raptor, which I think is one of the best charging handles out there on the market today. A couple of other Strike Industries parts round out the upper. First, I had to really commit to the gold accents, so I picked up a Strike Industries Forward Assist in gold. I think it looks pretty awesome, especially paired with the gold BCG. And lastly, a product I really love and think everyone should try is the Strike Industries Enhanced Ultimate Dust Cover. It blows MIL SPEC dust covers out of the water. No more dealing with the headache of installing the MIL-SPEC covers. The Strike dust cover is a polymer and just snaps into place. They come in a few colors and they’re only about $15.
THE BARREL
For my barrels, I tend to go with stuff I know will get the job done. Balance that with the price point I’m trying to hit for a specific rifle build, and that generally narrows down my barrel choice to a small handful of brands I trust. For this build, I kept it simple with a 16” 5.56 NATO Ballistic Advantage barrel with a 1:7 twist. It’s their government contour, so it’s not the lightest barrel in the world, but it’s a compromise which is what the Government contour is meant to be. And, as I said, weight wasn’t the primary concern on this build. Being really ugly was. And, I knew I had to consider the cost I was going to have to pay for the Cerakote process on all the parts. So, I tried to save some money while still getting the kind of performance I wanted out of a rifle I’m going to shoot often. I like Ballistic Advantage because when I look at the attention to detail they give to the smaller things like the finish and the feed ramps, it says a lot about the pride they take in making a quality product.
HANDGUARD AND ACCESSORIES
As I said before, the handguard and upper were a part of the Enhanced set offered by Aero Precision which was new at the time I was building this AR-15. Back then, Keymod had the majority of support in the market for accessories, so that’s what I went with. I don’t necessarily have a preference between Keymod or M-LOK, it’s just what we had at the time.
I’m a big proponent of weapon lights, so one was bound to end up on this build. One of my co-workers in the PA Customer Service department, Jimmy, had a Streamlight ProTac HL-X on his rifle and I really liked the way he had it set up. So that was my choice for this build. The awesome thing about this light, in my opinion, is that it comes with the tape switch and end cap attachment standard. You don’t have to pay extra for them. And for the money, it’s really an awesome value all around – it’s only about $110. You could easily pay more than twice that for other 1000 Lumen weapon lights.
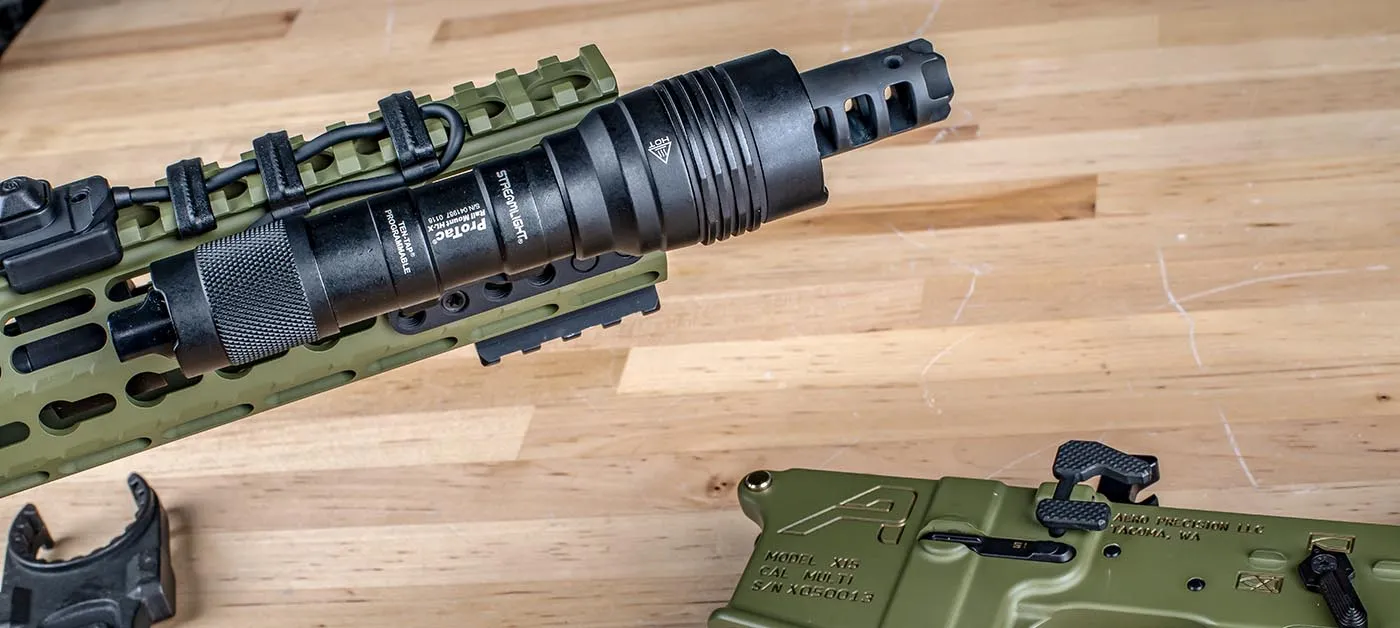
Down on the end of the barrel is another favorite AR upgrade of mine. The Lantac Dragon muzzle brake. A lot of builders won’t prioritize a muzzle device upgrade for their AR-15 because of how little recoil a 5.56 cartridge has already when shot from an AR. I think they’re worth it, though, because every advantage matters in a defense scenario or if you’re a competition shooter. The Lantac Dragon significantly reduces the amount of recoil you feel in addition to keeping the muzzle down and on target for really fast follow-up shots. There are a lot of awesome muzzle devices available out there, and many of them mitigate recoil and muzzle rise, so if you want to check out what you’ve been missing without one, just find one that fits your budget and try it out.
FURNITURE
When it comes to things like stocks and grips, I tend to like what I like. For my stocks, it is important to me to have a good cheek weld that’s repeatable and natural whether my stock is extended, or my nose is on the charging handle. I also like stocks that fit snugly on the buffer tube – I don’t want my stocks rattling around. When it comes to pistol grips, I’ve realized over the years that I like a more vertical angle, rather than the MIL-SPEC grips that angle more rearward. I think the more vertical angle just gives me a better feeling of control, it feels more natural to bring the gun up from a low-ready position and get a consistent cheek weld when I have the right stock and grip combo.
To me, that perfect combo comes from B5 Systems. They focus on the function their parts are supposed to accomplish, first and foremost, and that’s what I like about them. For my stock, I use the B5 Bravo. It’s simple, the fit is excellent, and the cheek weld is better than pretty much any other stock at this price. My pistol grip of choice is the B5 Type 23. It’s rugged, has a good texture to it that would be easy to stipple if you felt like it, and the more vertical angle is perfect for me. They work on a budget too, at around $20. To give you an idea of just how much I like this combo, I actually had a plasti-dipped stock that had to have the coating removed by hand so it could get the Cerakote top coat like the rest of the gun. It took a lot of extra effort, but it was worth it to get this stock on this rifle.
Lastly, I have some bazooka green Cerakoted Hexmags and PMAGs. I don’t particularly have a preference for one over the other – I think they both work really well. But I will say, I like the texture of the Hexmags a lot and that’s why I tend to use it most for this rifle.
THE OPTIC
I knew from the second we began working on the PA 1X Prism with Cyclops reticle that it was the perfect optic for this build. Of course, it had to be slightly modified with its own bazooka green Cerakote job, but once that was accomplished, it fit right in. I couldn’t wait to get this optic on a rifle. I think it’s easily the best 1X Prism scope on the market and while I love red dot sights too, they have limitations. The etched glass in the Cyclops means I have the flexibility to get a good contrasting sight picture no matter what the conditions are. If the red illuminated reticle is just not working to give me the crisp point of aim I want for whatever reason, I can get a high-contrast sight picture in a bright environment with the illumination off, just using the black reticle. Also, no red dot can give you ranging capabilities. That’s a huge advantage. And most of all, I think the chevron center aiming point is a superior design to even a small MOA dot, or just about any other crosshair design. People love the CQB horseshoe, but I love the chevron. The Cyclops is the best combination of speed and precision I’ve found and for the money, I don’t think there’s anything out there that can beat the Cyclops.
That’s my Bazooka Green build! I hope you enjoyed both checking it out and getting the rundown on all the stuff that went into building it. Hopefully, the description of my parts list inspired you to try something new for your next build. Here’s a bonus shot of the Oakley Sunglasses and Custom Glock 19 I had Cerakoted to match this build. When I commit to something, I do it 100%! If you’ve ever got questions about these parts, or any other product we sell here at Primary Arms, our team strives to be the industry’s best customer service team. So give us a call at (713)-344-9600 or send us an email at info@primaryarms.com.
